The SM57 Mod – make an £80 mic sound 4x more expensive

So, I’ve heard about a (nearly) free modification for the Shure classic microphone the SM57 and after seeing it step by step in a recent edition of Tape Op (if you’re serious about recording in any way, subscribe to Tape Op), i got the modding bug. We’ve got a few of the these that we use down at the studio and as we rarely use more than 3 of the four in one go, I decided we could afford to Mod one to use as a different flavour. Here’s the process:
– Unscrew your trusty 57 at the middle and snip the wires that lead from the capsule into the body of the mic.
– Loosen the grub screw (you actually screw it in, not out) which holds the XLR section of the mic in place, remove the XLR and snip the wires that lead into the body (towards the transformer).
– boil a pan of water (yes, really) and drop the body of the mic (the bit that you removed the xlr from) , not the capsule, into the water until the silicone/glue that’s keeping the transformer in place can be removed, along with the transformer. You’ll need tongs and an oven mit. Mic bodies really transmit heat well.
– remove the gunk, and the transformer. Bin said transformer. It’s most likely dead.

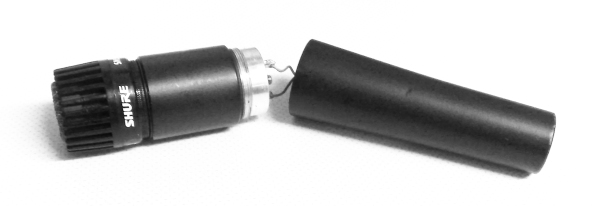
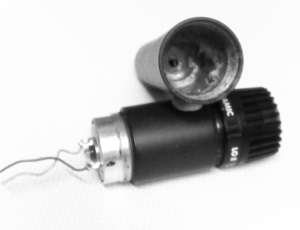
– dry your mic out and make sure you can get your cable back through the remaining hole. You should have something like this…
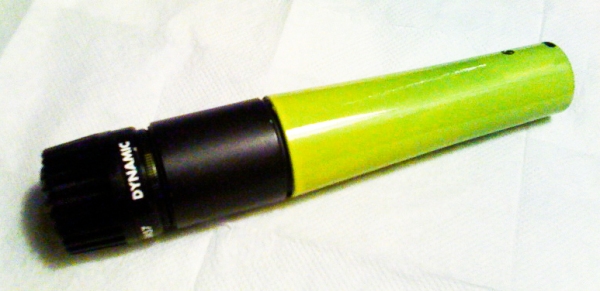
– Now is the time to paint the body of your mic should you choose to do so. I had some yellow spray paint, and decided to just paint the body. Now I’ve got a two tone mic! Once your paint is dry, we just need to hook the mic to the xlr and we’re go, sooo
– Now some articles on this suggest that you should use shielded mic cable to this, though I have a feeling any good wire will do, so wire the positive pin from the capsule to pin two of XLR mic cable connector (hot/+), and the negative pin from the capsule to pin 3 (cold/-), and leave pin 1 as ground (this applies to newer 57’s as they’re grounded via the connector sheild to the body of the mic).
– Screw your mic back together and attach the xlr and you’re away!

Transformerless Two Tone SM57
I’ve yet to try it out, however rest assured I’ll post some audio comparing original and modded mics. Also, many people compare the modded SM57 to the much more expensive SM7 (The mic used for all the vocals on Michael Jackson’s “Thriller”).
If you want to hear different modded versions of the SM57 before I can get round to that, then a very informative video on youtube and the same guys have a pro-tools session and audio files for you to download they detail how to get that on the youtube page. If you can’t wait, and want it now now now, try this post on GearSlutz.com.
I’ll be back soon with my audio examples.
With the crisis that’s going on in the world today, you gotta be a smart ass. I would like to refer modding as “innovating”. There, that’s a more legal word. The mic looks great by the way:-)
Oh let’s not get the lawyers involved! ;)
Thank you – glad you like the look of her. I’ve been trying her out on some vocals to great effect. (Audio samples soon)
To clarify, you’re not suggesting a problem legally though are you? Worst case scenario it invalidates the guarantee.
No need to boil it, just use a heat gun and you won’t damage the transformer. If you want to use it again just wire it between a male and female XLRs. Cheers
It won’t work if you don’t paint the body, I tell ya!
it’s true! BTW, new blog lives up here > http://www.richhuxley.com/2009/09/sm57-modification/
;)
Really like this video. If you’re going for a totally different sounding mic or your pre’s are weak, by all means do it. If you’re going for an SM7 sound, you really don’t need to melt out the transformer.